

Using BurpSuite with WSL2
10 Feb 2021 · Comments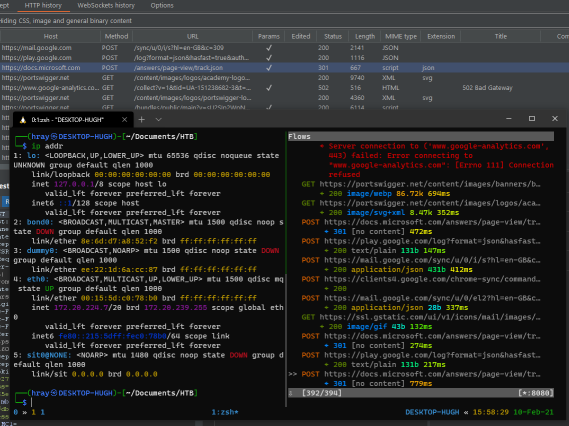
Windows Subsystem for Linux 2 (WSL2) is in a great place right now. Almost all of the issues that plagued Microsoft’s first WSL release have been resolved. The only issue I’m still aware of is some difficulty surrounding mounting additional virtual disks within WSL – but that’s hardly a day-to-day inconvenience. As a result, I’ve finally ditched VMWare and fully made the transition to WSL2.
WSL2 on the command-line is natively great for infrastructure testing, but when assessing web applications, some form of GUI is of course required. Various solutions exist to this problem, including the use of Win-Kex for Kali Linux. Whilst initially an acceptable solution, I grew unhappy with the VNC solution, and wanted a true WSL 2 terminal experience. As most VPN profiles (such as those used with HackTheBox or TryHackMe) only permit a single connection, either the Windows host OR the WSL2 environment can be connected when using a VPN. With a bit of tinkering, I was able to establish a way of getting things working with a VPN running inside WSL2, and running BurpSuite successfully on my Windows host, keeping my desktop environment clean and tidy.
The goal was relatively simple; establish a solution whereby BurpSuite could intercept web traffic between Google Chrome running in my Windows environment, at the same time as making use of a VPN profile within WSL2.
WSL2 eth0 IP Addressing
The first hurdle on the path to my solution was WSL2’s IP addressing solution. In the current version of WSL2, it is impossible to configure static IP addressing. Microsoft are supposedly working on this, but as of publishing this post, no such functionality exists. This doesn’t sound great for our configuration of proxies between the two systems, as we’d have to reconfigure every boot with the newly aquired IP!
Insider Preview Build 18945 reportedly made things easier by allowing localhost access to Linux apps from Windows. I believe this approach works inconsistently at best, and is not something that can be relied upon.
If you Google around for static IP addressing, you can see that it’s been raised as an issue on Microsoft’s WSL GitHub repo, with a potential workaround. The solution proposed by Edwin Chiwona involves portforwarding required ports so that they’re accessible by the host, and then just referencing localhost:xxxxx where needed. Unfortunately, Edwin’s solution didn’t work out of the box for me, and as such I had to make some changes. I’ll run you through my process, and provide you with my PowerShell script below.
Port Forwarding at Log on
To achieve this, we need to create a Scheduled Task to run just after log on. Open Task Scheduler and select ‘Create Task’.
General

Name your task something appropriate, and ensure that the ‘Run with highest privileges’ option is selected in order to allow Administrator level commands to execute.
Triggers

Configure the task to begin at log on, with a delay of 10 seconds.
Action
The following is the contents of my WSL2.ps1 file:
$remoteport = bash.exe -c "ip addr | grep -Ee 'inet 172'"
$found = $remoteport -match '\d{1,3}\.\d{1,3}\.\d{1,3}\.\d{1,3}';

if( $found ){
  $remoteport = $matches[0];
} else{
  echo "The Script Exited, the ip address of WSL 2 cannot be found";
  exit;
}

#[Ports]

#All the ports you want to forward separated by coma
$ports=@(8080);


#[Static ip]
#You can change the addr to your ip config to listen to a specific address
$addr='0.0.0.0';
$ports_a = $ports -join ",";


#Remove Firewall Exception Rules
iex "Remove-NetFireWallRule -DisplayName 'WSL 2 Firewall Unlock' ";

#adding Exception Rules for inbound and outbound Rules
iex "New-NetFireWallRule -DisplayName 'WSL 2 Firewall Unlock' -Direction Outbound -LocalPort $ports_a -Action Allow -Protocol TCP";
iex "New-NetFireWallRule -DisplayName 'WSL 2 Firewall Unlock' -Direction Inbound -LocalPort $ports_a -Action Allow -Protocol TCP";

for( $i = 0; $i -lt $ports.length; $i++ ){
  $port = $ports[$i];
  iex "netsh interface portproxy delete v4tov4 listenport=$port listenaddress=$addr";
  iex "netsh interface portproxy add v4tov4 listenport=$port listenaddress=$addr connectport=$port connectaddress=$remoteport";
}
echo "The script completed!"
This file gets the IP address of your WSL2 machine, deletes any previous portforwarding and firewall rules, and then establishes the new firewall rules and port forwarding configuration. Feel free to change 8080 to some other port, should you wish to run your proxy on an alternative port.
In order for the $remoteport = bash.exe -c "ip addr | grep -Ee 'inet 172'" command to execute sucessfully, you must first ensure that the WSL environment you are trying to port-forward is your default. Otherwise, bash will execute against the wrong environment. It took me a fair amount of time troubleshooting before I realised this - my default was Ubuntu, whilst I was trying to port forward Kali!
You can check your default wsl environment with the command wslconfig /l. As Ubuntu was my default, I needed to follow this up with wslconfig /setdefault kali-linux. You may have to do the same for your distribution.

The suggestion on GitHub is to set the system-wide execution policy to unrestricted. I wasn’t keen on that approach, so instead just configured the action to execute with the -ep bypass arguments.
Save your script in a location not writeable to low privilege users, set it as the target of the Task Scheduler action, and accept the changes to create the task! Run the script once now, and it will then automatically run when you log in subsequently.
Proxies, proxies everywhere
My approach makes use of two proxies; BurpSuite’s own HTTP interception proxy, and mitmproxy, which is installed by default in Kali Linux.
By default, mitmproxy runs on port 8080, which is why I have forwarded that port in my PowerShell script. After getting mitmproxy running, visit mitm.it and download the CA certificates. You will need to install these on Windows, as you would have done for Burp.

Configure your burp proxy listener in your browser as you would usually. As we’re running mitm port-forwarded on 8080, I chose to run my burp proxy on 8081.
From there, you will need to configure an upstream proxy in BurpSuite. You can find the setting in User Options > Connections. Since we’ve configured the portfowarding, we can set the proxy host as localhost, and you won’t need to change it every reboot.
Usage

With that done, our solution is complete. We should be able to connect to our VPN within WSL, launch mitmproxy, and then use BurpSuite on our host!